Step by step - How to configure the annotation toolbar?
The annotation toolbar is the bread and butter of working with Epigraf. Annotations allow editors to link text passages with controlled vocabularies, format text, or add footnotes and memos.
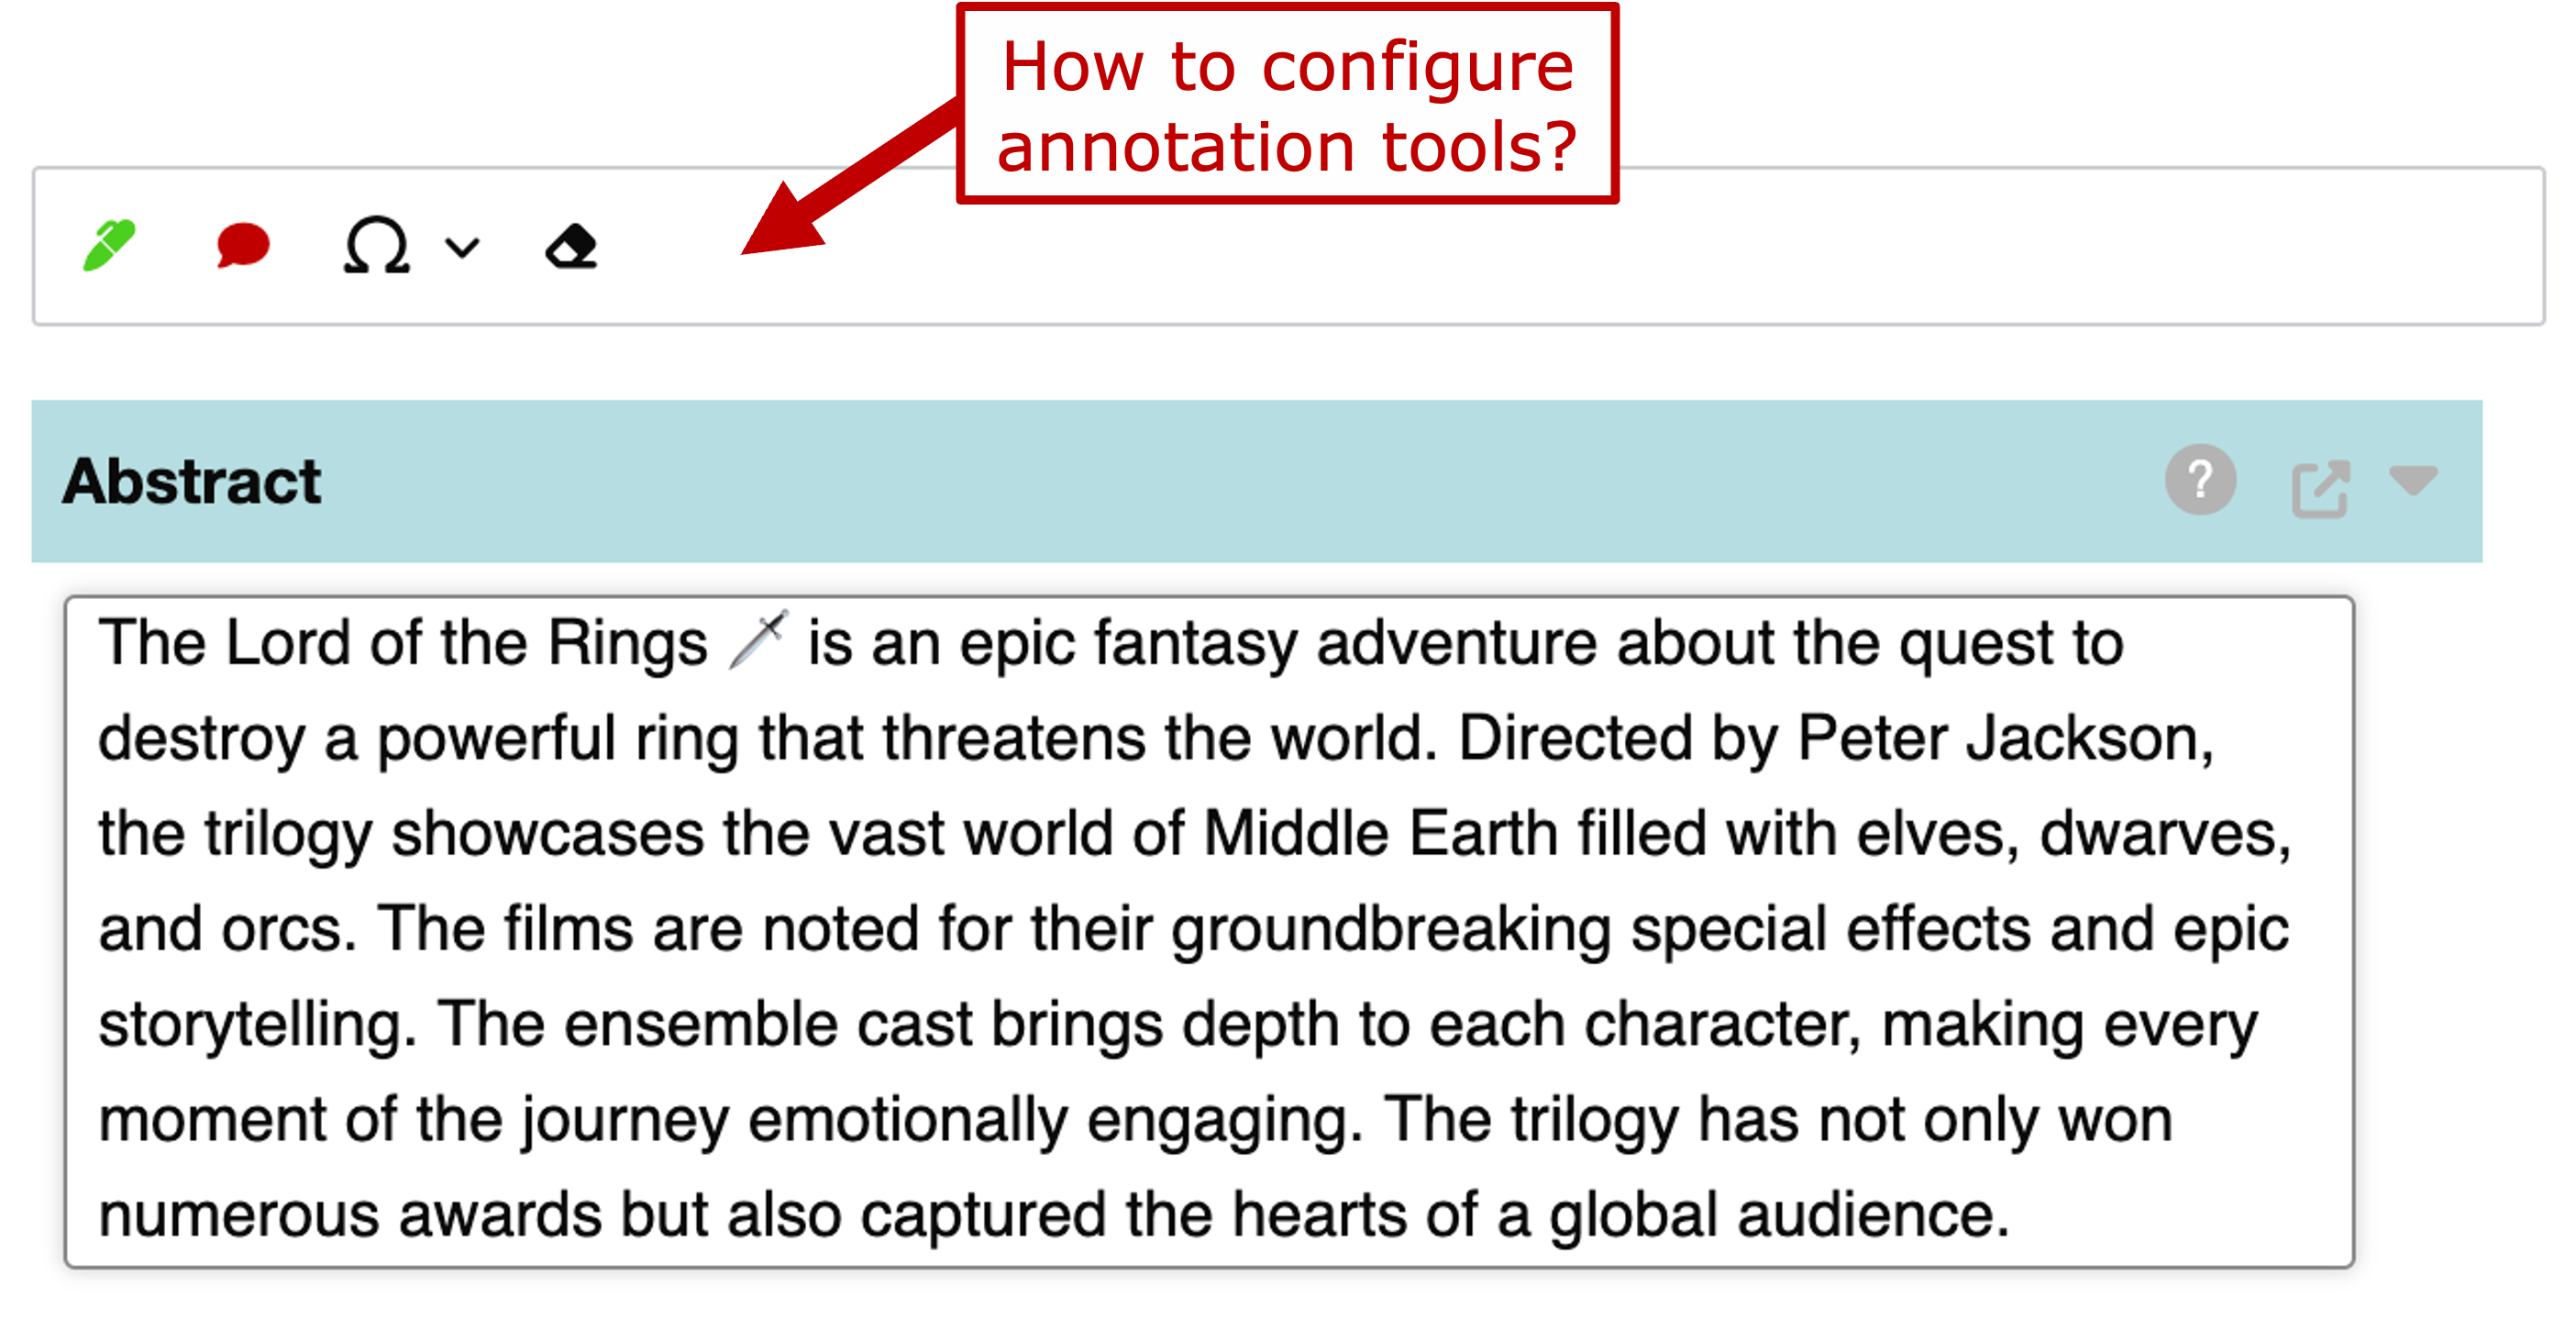
The following guide walks you through configuring the annotation toolbar that appears when editing text items in Epigraf. By the end you will know how to add, remove or reorder buttons. The examples refer to the movies database that ships with Epigraf. You need admin permissions to create the movies database and to modify its configuration. But you can use the same techniques on other databases of your choice.
That being said, let’s consider what implementing an annotation requires from the perspective of the Relational Article Model (RAM):

Looking at the diagram above there, there are three routes from articles to properties. You can reference properties directly in an item, you can annotate text with properties via the links route, or you use footnotes containing links to properties. Assuming that we already have an item containing a text field, we take the second route to link text passages to properties. This means that we need to set up a links type as well as a new property type (linking to existing properties also works, of course).
Articles in the movies database provide an “Abstract” section that features a short summary of a movie within a subordinated text item. Starting from here, let’s add a new annotation that will allow authors to link locations mentioned in the abstract to fictional places.
1. Enable annotations in an item configuration
Begin by switching to the Types of the movies database. Note that any higher-level configuration directly influences the next lower-level element within the RAM. Thus, before we add a new links type, let’s have a look at the configuration for items that contain the abstract. In the movies database, the item type is called “text”. Either browse for it using the search field or by filtering for configuration types of the “items” scope.
How do we know that the "text" item type is the one we need to edit? The best way to find out is to check the XML version of an existing article which closely reflects the RAM structure. Open any article in the movies database in a new browser window and click the "XML" button in the footer. Search for the "Abstract" section and note the structure around its content. Each element will have an attribute indicating its type, in our example look out for the `itemtype` attribute.
The item type configuration contains the following field configuration:
{
  "fields": {
    "content": {
      "format": "xml",
      "types": "annos"
    }
  }
}
What does the configuration tell us? Well, checking the items configuration
documentation we see that
the available fields of an item are defined in the fields key and that the
content field is the default field for text data. Looking at the fields configuration documentation,
we can see that the format key marks the content as being XML, in which case available annotations are defined in the types key.
In XML fields the types key indicates which annotations are permitted by either directly listing link type
names or, as in our case, naming a link group. So now we know that our text
item that sits in the abstract section permits all annotations in the “annos” group.
2. Add a links type including a button to the toolbar
Let’s add our new link type and add it to the “annos” group. This will make it available in the abstract item and add a new button to the annotation toolbar.
Click Create type in the footer and fill in the form as follows:
- Scope: “properties”
- Name: “place”
- Caption: “Place”
- Description: “Fictional places mentioned in the abstract.”
- Category: “Annotations”
- Number: “90”
- IRI fragment: “place”
The name should always be as short as possible because it is used as an XML element in the content. Large element names will make the XML content verbose and difficult to read. It is not necessary to use the same value for the caption or IRI fragment. Thus, you could decide to use “plc” as the name and have more human friendly values for the caption and the IRI fragment.
A description and a category are optional, they help you to organise your configuration as it grows. The number is not strictly necessary, but it determines the order of the buttons in the toolbar.
Paste the following JSON configuration:
{
    "group": "annos",

    "toolbutton": {
        "symbol": "🗺",
        "font": "awesome",
        "style": "color: #FFD83B;"
    },
    "shortcut": "alt+3",

    "tag_type": "format",
    "css_style": ".xml_tag_place { background-color:#FFCE01; }",
    "color": "#FFD83B",

    "fields": {
      "to": {
        "format": "record",
        "manage": true,
        "targets": { "properties": ["places"] }
     }
   }
}
Leave the other fields as they are:
- Mode: “Default”
- Preset: “default”
Let’s briefly go through the most important parts of the configuration.
As we want to link item content to properties, we need to define the two ends of the link.
On the one end, the group value matches the value in the item configuration’s types key.
As made clear above, this grouping value controls what annotations will be available in a given item field.
On the other end we configure the to field of the links entity to accept targets of the “places” property type.
The field configuration is somewhat verbose because it is quite flexible and allows for a wide range of annotations.
When learning how to configure Epigraf, we recommend to copy&paste settings from existing databases
or from examples in link type configuration documentation.
All other settings in the configuration define how the annotation will look and behave in the toolbar and in the text.
We are using a symbol from Font Awesome for our toolbutton and give it a yellow color.
By setting the tag_type to format and defining a CSS style, we also make sure that annotated text passages will be highlighted in yellow.
The additional color key makes sure the annotation boxes displayed next to the text are also yellow.
Alright then, open any article of the Movies database, enter the edit view, click into the abstract field and see if the new button has appeared. Now, whenever you highlight a text passage and hit the button (or the ‘Alt+3’ shortcut on your keyboard ), a new link will be created, and a dialogue will pop up asking you to select a place from the fictional places category.
What category you might ask, and you are absolutely right to do so. As of now, trying to annotate a place throws an error. That is because we have not yet configured the places property type. Let’s do that now.
3. Introduce a new property type
Notice how, just as before, we are now configuring the next lower-level RAM element, from links to properties type.
Click Create type in the footer and fill in the form as follows:
- Scope: “properties”
- Name: “places”
- Caption: “Fictional places”
- Description: “Fictional places mentioned in the abstract.”
- Category: “Diegesis”
- IRI fragment: “places”
The name must match the property type added to the fields configuration of the links type. Note the plural form. Although you are free to choose any name or caption you like, we recommend the plural for property types as the captions are used in the categories menu.
Paste the following JSON configuration that defines the lemma field of the new property type:
{
  "fields": {
    "lemma": "Name"
  }
}
Leave the other fields as they are:
- Mode: Default
- Preset: “default”
- Number: 0
Here we go! Now that we configured a places property type, annotating does not result in an error any longer. However, the dropdown selection for the places property is still empty.
4. Add fictional places to the properties list
To add fictional places to be used for annotation, let’s head to the Categories of our database. You will find our “Fictional places” category system sitting under “Diegesis” in the navigation bar to the left.
To add a category, hit Create property in the footer and enter “Middle Earth” into the name field.
Insert as many categories as you deem appropriate.
All will be available to select in the places dropdown dialog when annotating.
5. Test your annotation toolbar
To test your newly expanded toolbar, open an article in the Edit view, then click into the text field under the Abstract section. The toolbar should appear instantly. Now highlight a text passage and hit the new button to verify that the new button is functional.
To gain a deeper understanding of how annotations are stored in the database, after saving an article with annotations, open the XML version of the article in a new browser window and inspect the content of the abstract item.
That’s it! You now have a fully customised annotation toolbar ready for everyday use.
What’s next?
- Experiment with the different tag types available for annotations. For example,
set the tag_type to
bracketand setprefixto “[” andpostfixto “]” to enclose annotated text with square brackets. You will find many more examples in the inscription databases that ship with Epigraf. - Configure a footnote type and add it to the toolbar. Footnotes are a great way to add comments or text-critical apparatus to your articles.
The procedure is similar to the one described above. Instead of a links type you need to create a footnotes type.
In the fields you need to define a
contentfield instead of atofield. Note that the content field of a footnote may be configured to accept annotations (the third route in the RAM graph above), but it is fine to just use plain text as well. And finally, you need to add the footnote type (or the group) to thefootnoteskey of the article configuration. Inspect thememofootnote type in the movies database for an example.